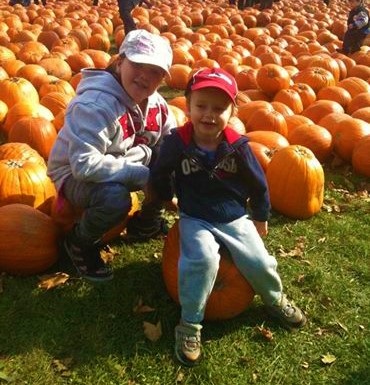
I have been celebrating Halloween for as long as I can remember. It is just a fun occasion to dress up as crazy or silly as you can be, maybe decorate your house and share some candy with friends. When I was younger my family and I would visit a local farm or market to select two or three good size pumpkins to make our own and we have continued that tradition with my own little family. In the past couple of years we have also added a new type of pumpkin to our porch – the teal pumpkin. The first year we had a teal pumpkin (for food allergy awareness) we just painted a real one and did not carve it. I am not sure how it would have turned out if we had. 🙂
Fast forward to this year and we now have three lovely, plastic teal pumpkins to display with our real orange ones. The teal ones will stay intact, but the orange ones, well, this is where the fun begins. 🙂 My children each get to select the pumpkin they like the most, whatever size it is, but they must commit to the job of carving and cleaning up afterward. I found that if we do not lay out some ground rules ahead of time, it can become a “messy” job, so here is what we do. I hope these suggestions work for you and your family as well.
Tools You Will Need:
- lots of newspaper
- large bowl
- recycle bag for food waste
- paper towels
- pencil
- large spoon
- pumpkin carving kit or
- an item with a sharp end for poking and
- a knife for cutting
Steps to Carving the Perfect Pumpkin:
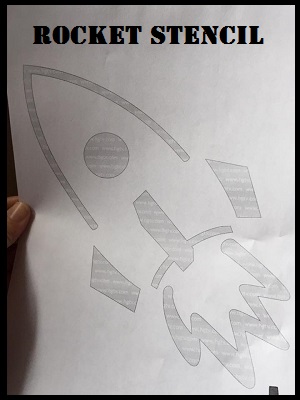
- Research some designs to carve out ahead of time. You can buy these cool pattern books in the craft stores and even download free printables on the web.
- Have all of your tools ready for the big cut. It’s no fun to go searching for a missing item when you are elbow deep in pumpkin guts.
- We like to wash our pumpkins first to get all the extra dirt off. This will also make the carving job a little easier.
- If you are using a template, I suggest tacking it to the spot on your pumpkin where you plan to carve. You can use toothpicks or even tape to keep it in place. Once the template is on, you will know how wide you can cut the top of the pumpkin (the lid).
- Next, trace out where you are cutting the lid and go to town! Make sure it is big enough to get your hands in there to scoop all the goodness out. 🙂
- Now comes the fun part and we let the kids do it all – scoop out those slimy guts and seeds. Once they have taken out as much as they can, my hubby likes to get in there and use a scraper to clean off the sides of the pumpkin, just to make it look good.
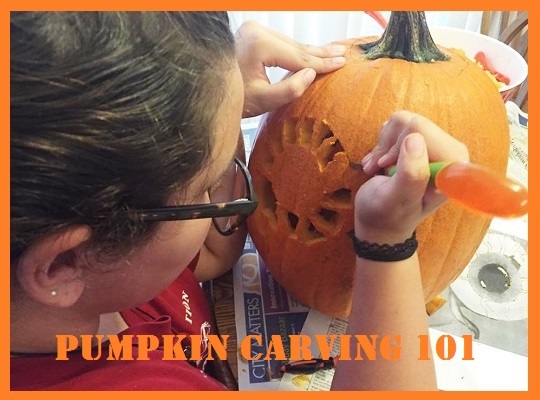
- Next step is to put your stencil on (unless you left it from earlier). At this point, I would use tape to keep it in place because you are going to be pressing on the stencil and don’t want it to tear. The stencils are the neatest thing to use. You can use a sharp poke tool or the tip of a knife to poke little holes along the stencil lines. This is much easier than tracing your design on the pumpkin itself. Once all of the little holes have been poked, you can remove the stencil.
- Now, you will want to use the cutting tool to go from poked hole to poked hole, slicing into the pumpkin. This is kind of like playing connect the dots.
- Dispose of your pumpkin guts and the chunks that were cut out, but putting them in your food recycle container.
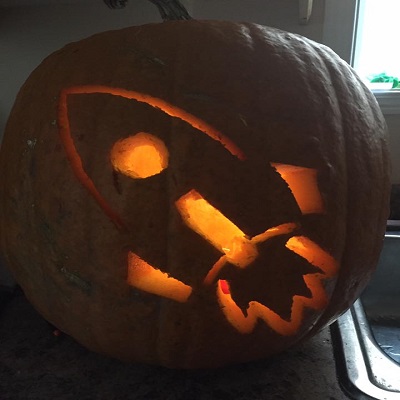
At this point the carving is all done and the clean up should be easy to do. The only thing left is to put your light in and see how it all looks! Happy Halloween!
Do you carve pumpkins? What are your favourite designs to try?
FT&PD
Suz
**Check here for a great Halloween craft idea.
**Ideas for Non-Food Halloween Treats for the #TealPumpkinProject, here and here.
I never have the patience to carve a pumpkin. We spend the evening with friends who live in the neighbourhood so we don’t really decorate at home anymore.
Pumpkin craving is so much fun and i see she is working hard at her masterpiece,have a great night.Happy Halloween be safe and enjoy !
My son loves carving pumpkins for Halloween, though I don’t think his kids get a look in – it’s serious work! I’ve watched and must say that the pumpkin carving kits that you buy are no good at all, they break way too easily. There must be better ones out there but we’ve not found them yet. 🙁
We have always carved a few pumpkins but they never look as good as the ones you see in the pictures.
That rocket pumpkin looks awesome. We used to carve them every year. I totally miss it.
we carve a couple pumpkins every year and usually mu husband draws something fancy and I carve it but this year I kind of lost interest in making something crazy cool. so i went for a simple face. Something i will do 100% next year…get a pumpkin carving kit instead of using a reg knife!! now that was not fun or easy
I am reading your blog long after Halloween has passed, however, I did learn something that I just might use next year. You can buy stencils? I didn’t know that. My husband is not keen on pumpkin carving, but now knowing that I can buy stencils, well……just maybe next year we will give it a try. Thanks for the tips, Suz! 🙂
This is an elaborate website……
We love craving pumpkins and always buy markdown after the season and the kids love to crave on the weekends!
We never craved this year,but i do have a few Pumpkins in the cellar so maybe later the Fall we will crave with the grandkids
Thank you for all of the tips. I especially think it is a good idea to research the design ahead of time!
I always loved carving a pumpkin every year and that’s before they thought of stencils lol
Your rocket design is super cute! I don’t do much carving but love to roast the seeds.