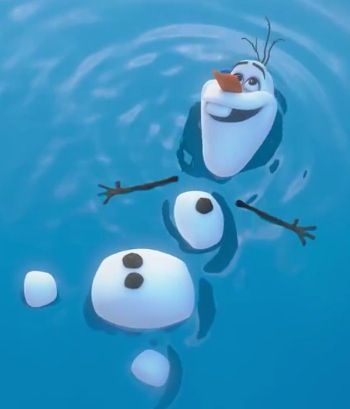
 Recently my hubby and I hosted a birthday party for both of our children. The chosen theme, aside from a One Direction cake for the pre-teen, was the Disney movie Frozen. I was charged with the task of showing our Disney Side, which is really a labour of love for me. Frozen has captured the heart of just about everyone I know and my children are no exception. My son loves to pretend he is Olaf and no one is allowed to sing or speak Olaf’s parts expect him. One of his favorite scenes is Olaf in summertime. Due to the age difference in my two, almost six years to the day, we decided to have our party at a local recreational centre so that everyone could go swimming. The fact that the party mess is not confined to my home is an added blessing. 🙂
While researching ideas for this party, otherwise known as stalking Pinterest, I came across some wonderful suggestions for decorations, games and food. The one I want to share with you is my favorite, Marshmallow Olaf Floats! If you have seen the movie you will recognize Olaf floating in the ocean, just “letting of steam.” They were so easy to make! Just make sure you have a good amount of room to store them in the fridge later on.
 Ingredients:
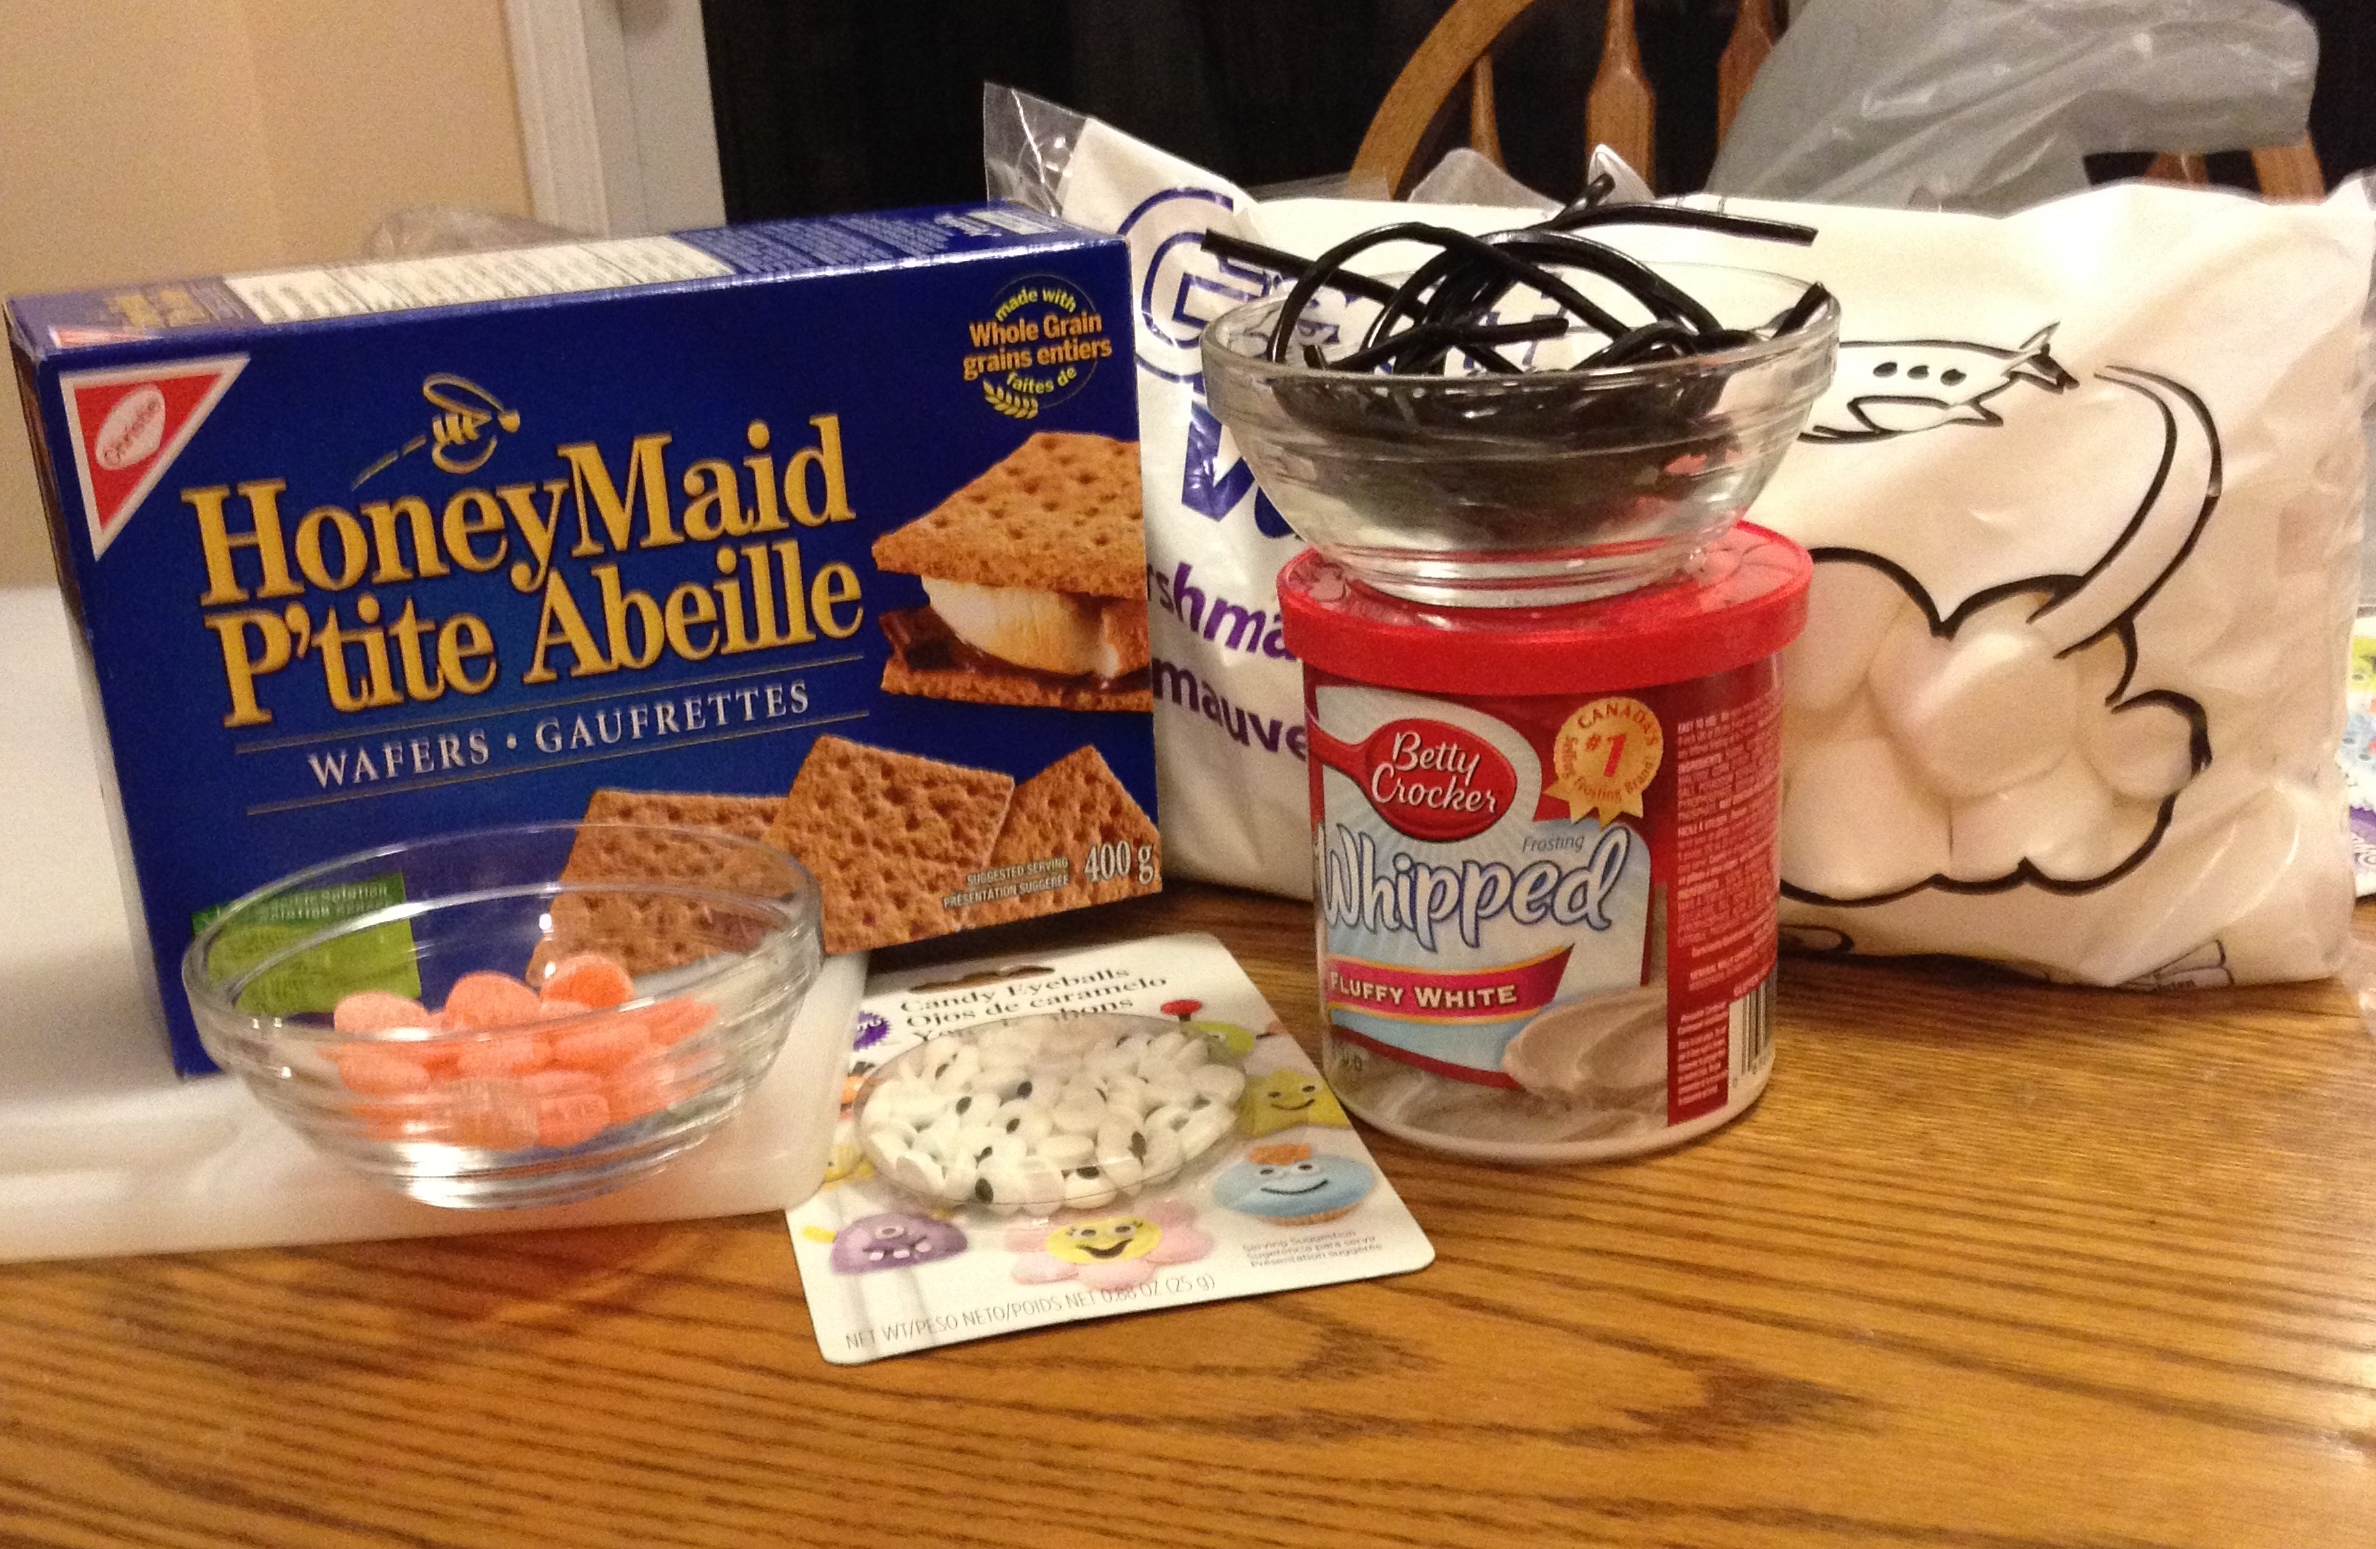
- One box of graham crackers
- One bag of jumbo marshmallows
- One bag of regular sized marshmallows
- One bag of mini marshmallows
- Pre-made white icing ( or you can make your own )
- Blue and black food colouring
- Black licorice string
- Orange candies like a jujube
- Candy eyes
- Sharpe scissors
- Damp cloth
 Directions:
Now comes the fun part. First you want to separate all of the graham crackers so that you have the individual rectangles. You usually get about three per graham cracker. Stack these up for use shortly. I did not use a whole box of crackers, but rather about one third. It just depends on the number of guests you are having. Much like my Chocolate Dipped Oreo Cookies a few of the crackers were broken during the separation process. 🙂
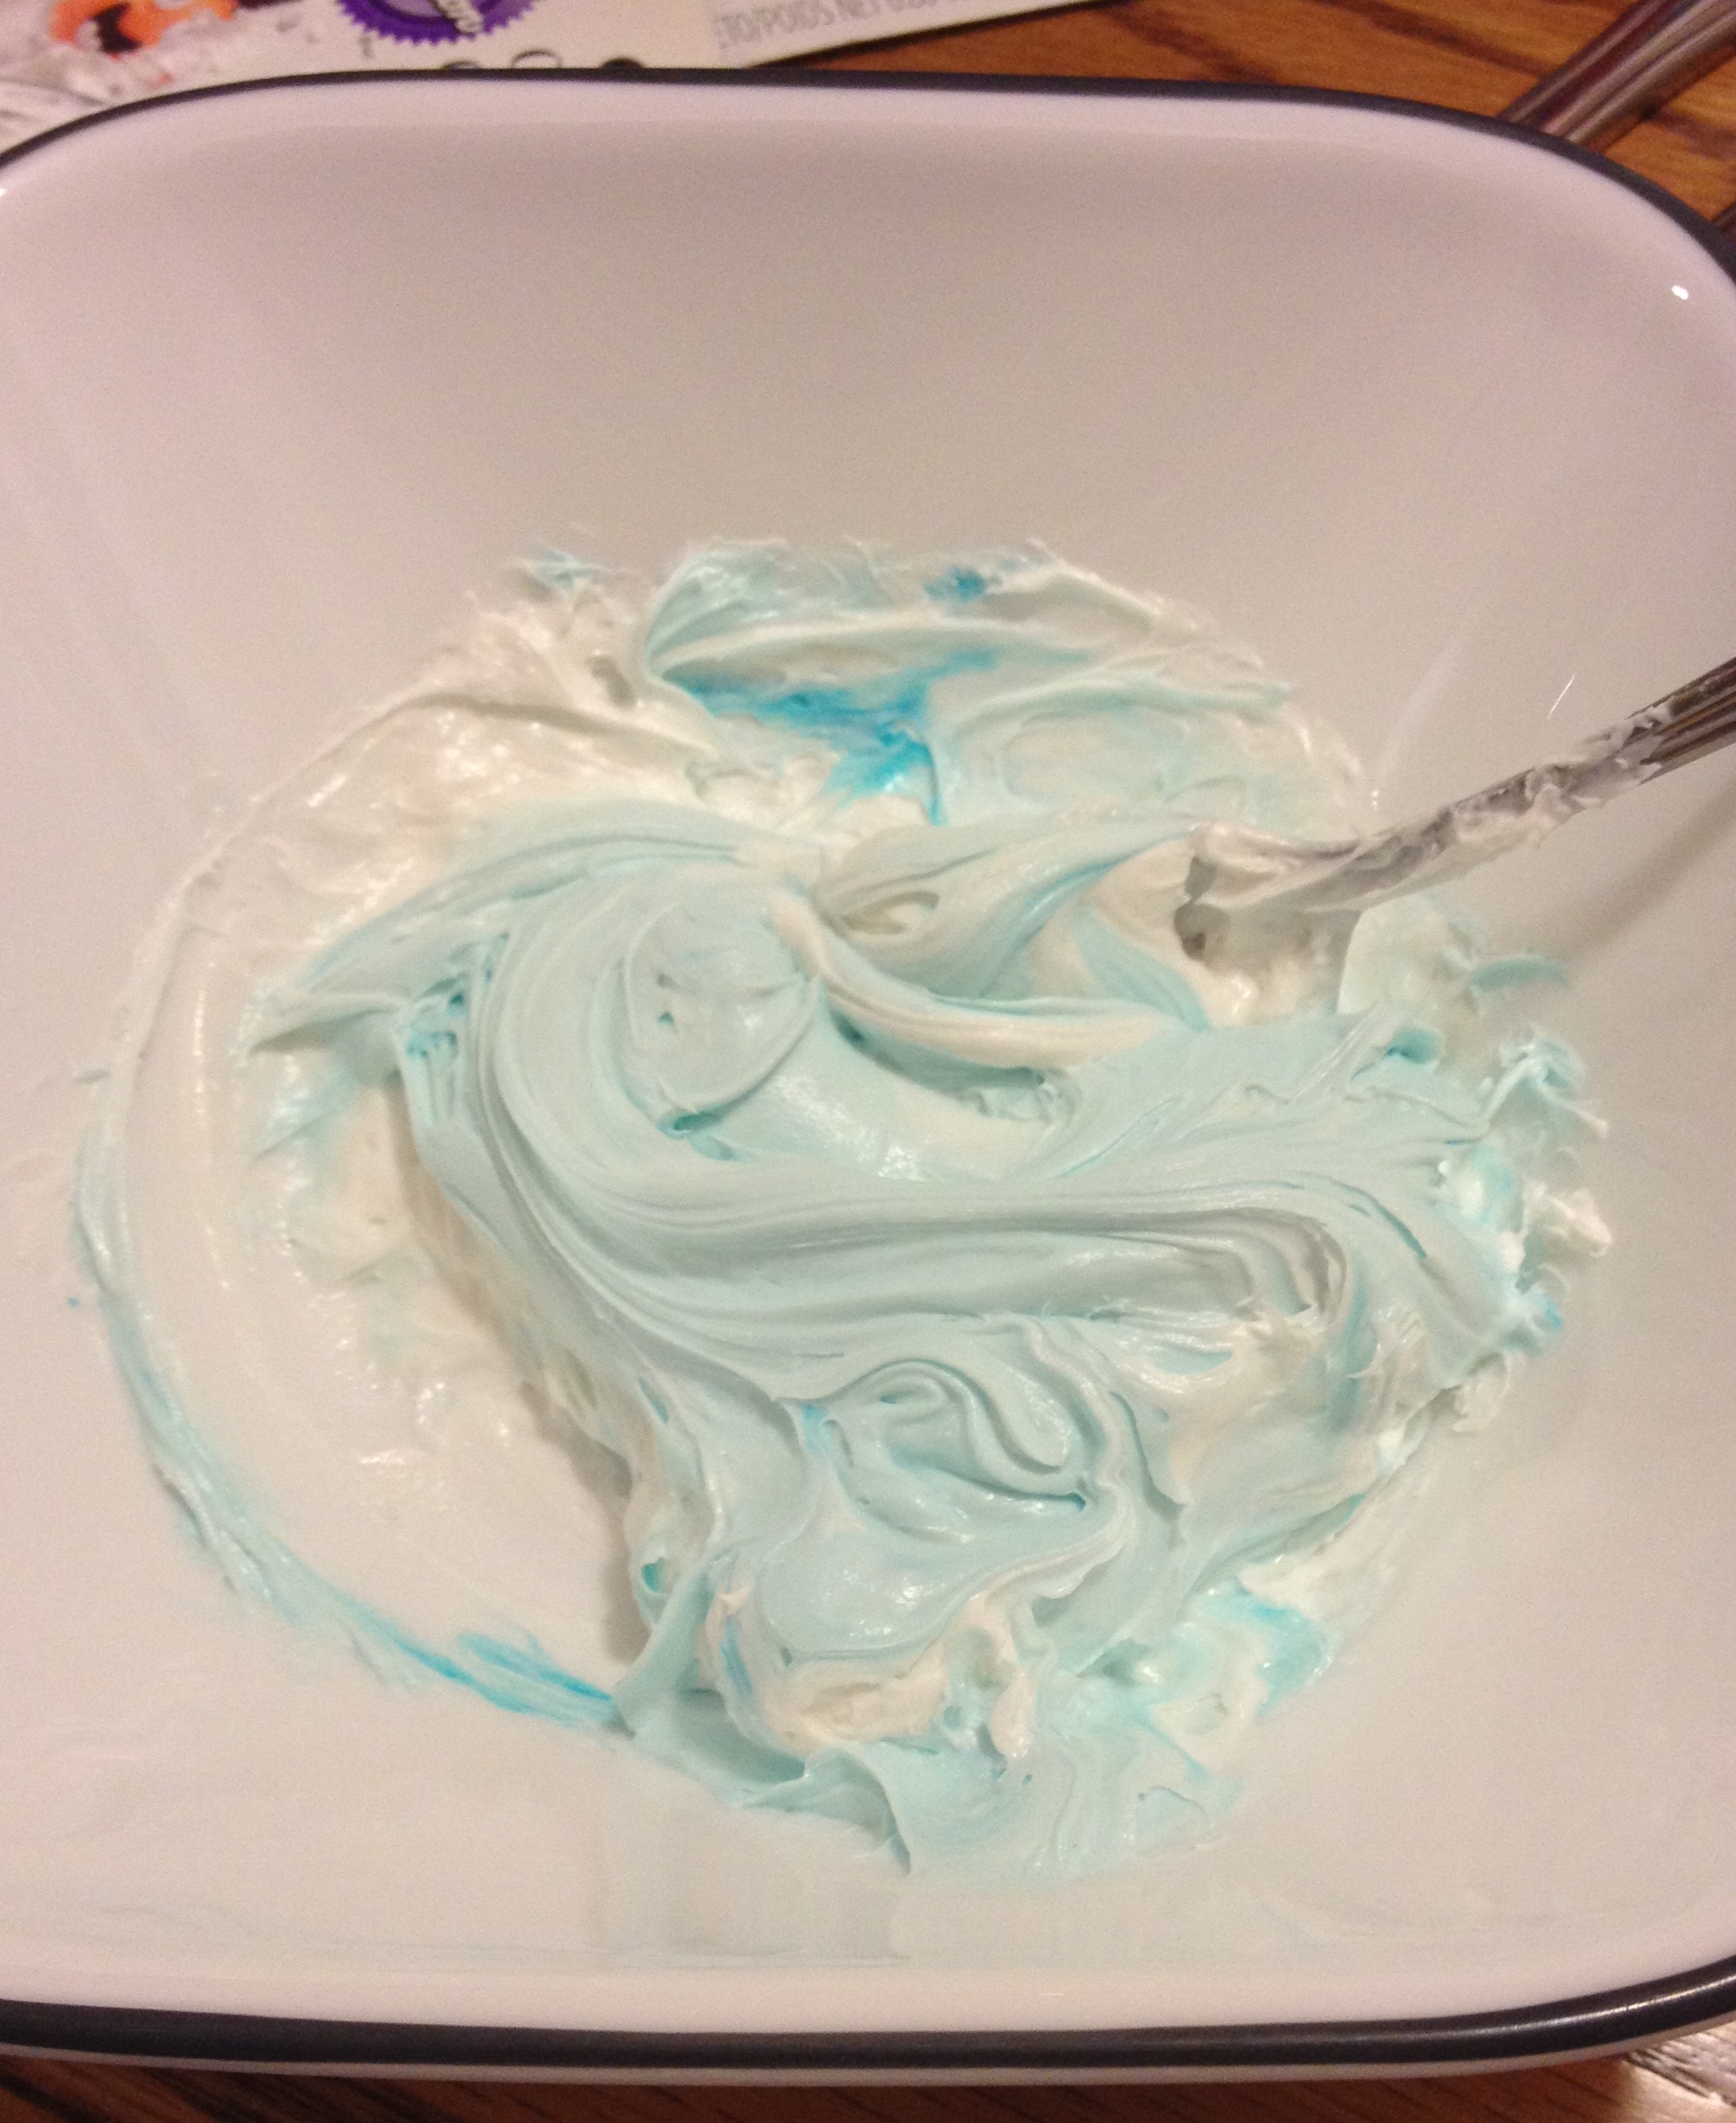
Next step is to mix some of the blue food colouring into the white icing. I used a Betty Crocker Whipped White icing, but of course you can make your own. Using the store bought stuff was faster for me and as I had multiple projects on the go that day it saved me time and some sanity. I would test out a small bowl of the icing with your food colouring to get the right shade of blue for your Olaf Floats. Think swimming pool or the beach. Once you have the colour you want mix up a large bowl and just add to it as you need it. You will also need to make a small bowl of icing mixed with black food colouring.
 Before you start putting your Olaf’s together I suggest putting the candy eyes in a bowl and cutting up the orange candy and licorice. The orange candy can be cut into very small “snippets”. These are going to be Olaf’s nose! The licorice can be cut into strips about an inch and a half long. You will need two for Olaf’s arms. Next cut up the licorice into strips about 1/3 of an inch long and then slice those into three. It sounds more complicated then it is. These little pieces are for Olaf’s hair so they need to be thin.
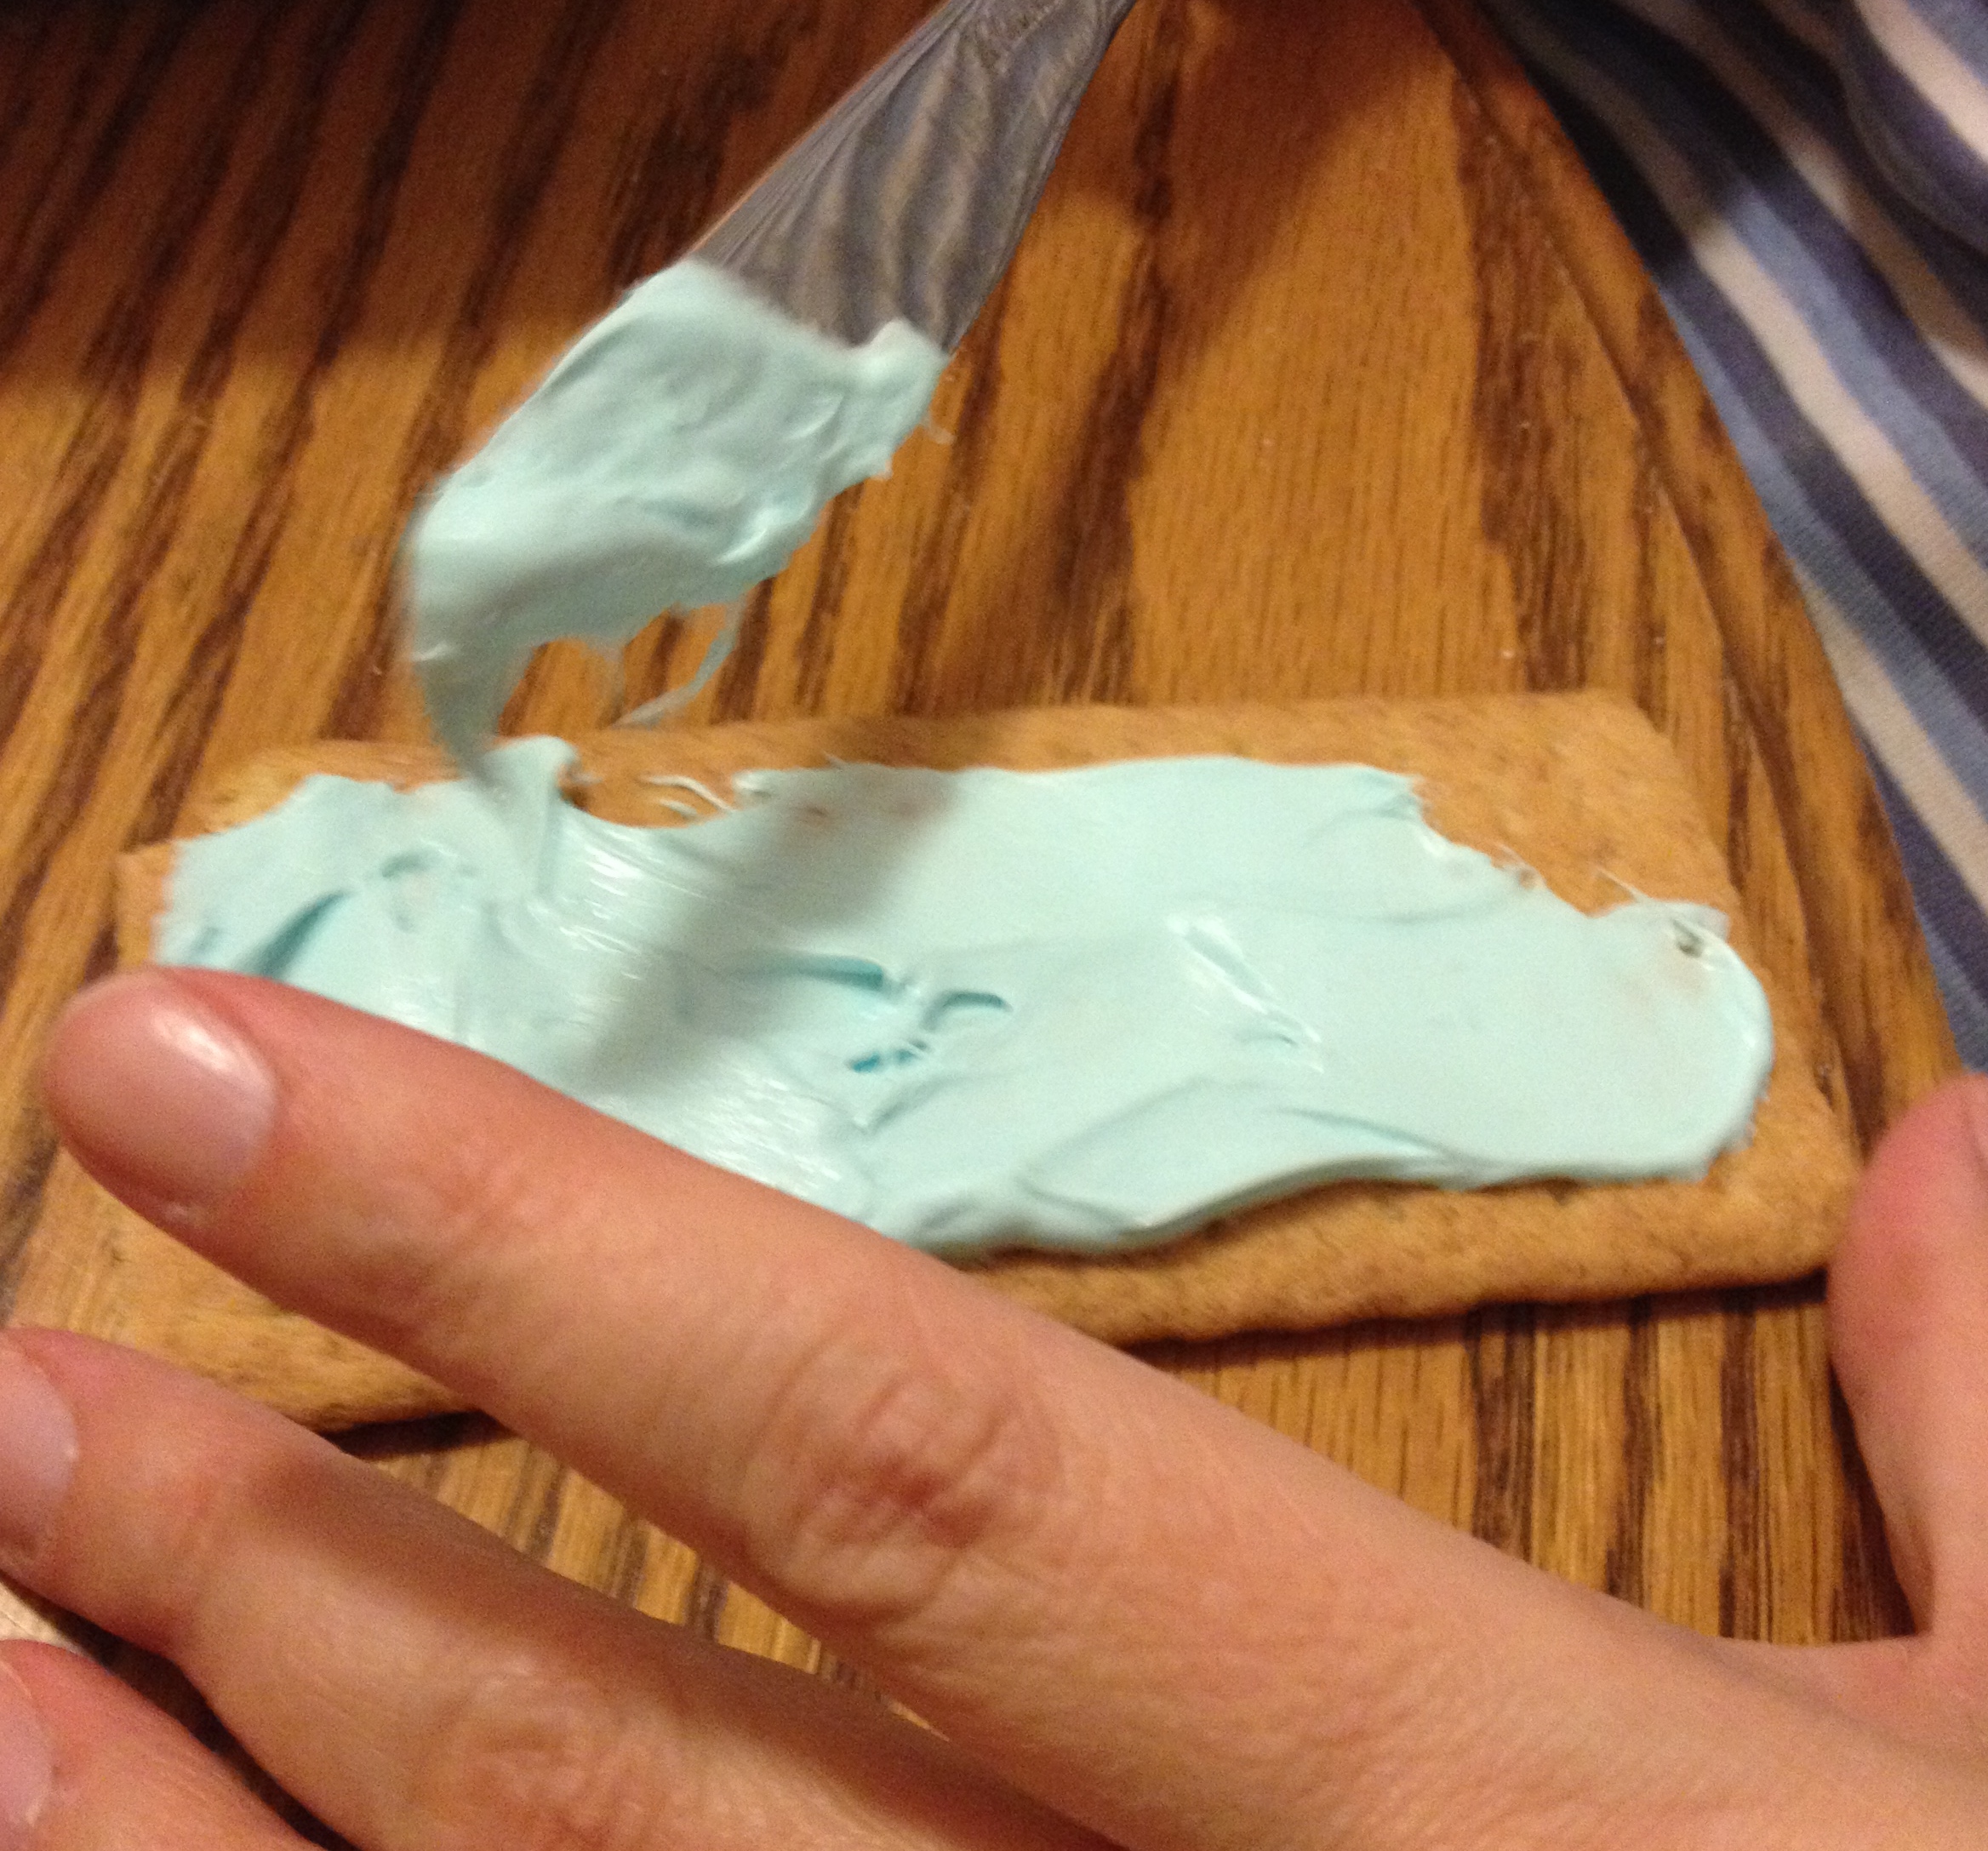
You are ready to begin! With a flat edged knife spread a layer of the blue food colouring over the entire top of your graham cracker rectangle. Take the icing right to the edge of your cracker. You do not need to worry about the icing being too thick, just make sure you do not see any brown cracker underneath. I did each cracker as I went, but if you have the room you may want to ice each cracker and then come back to assemble Olaf.
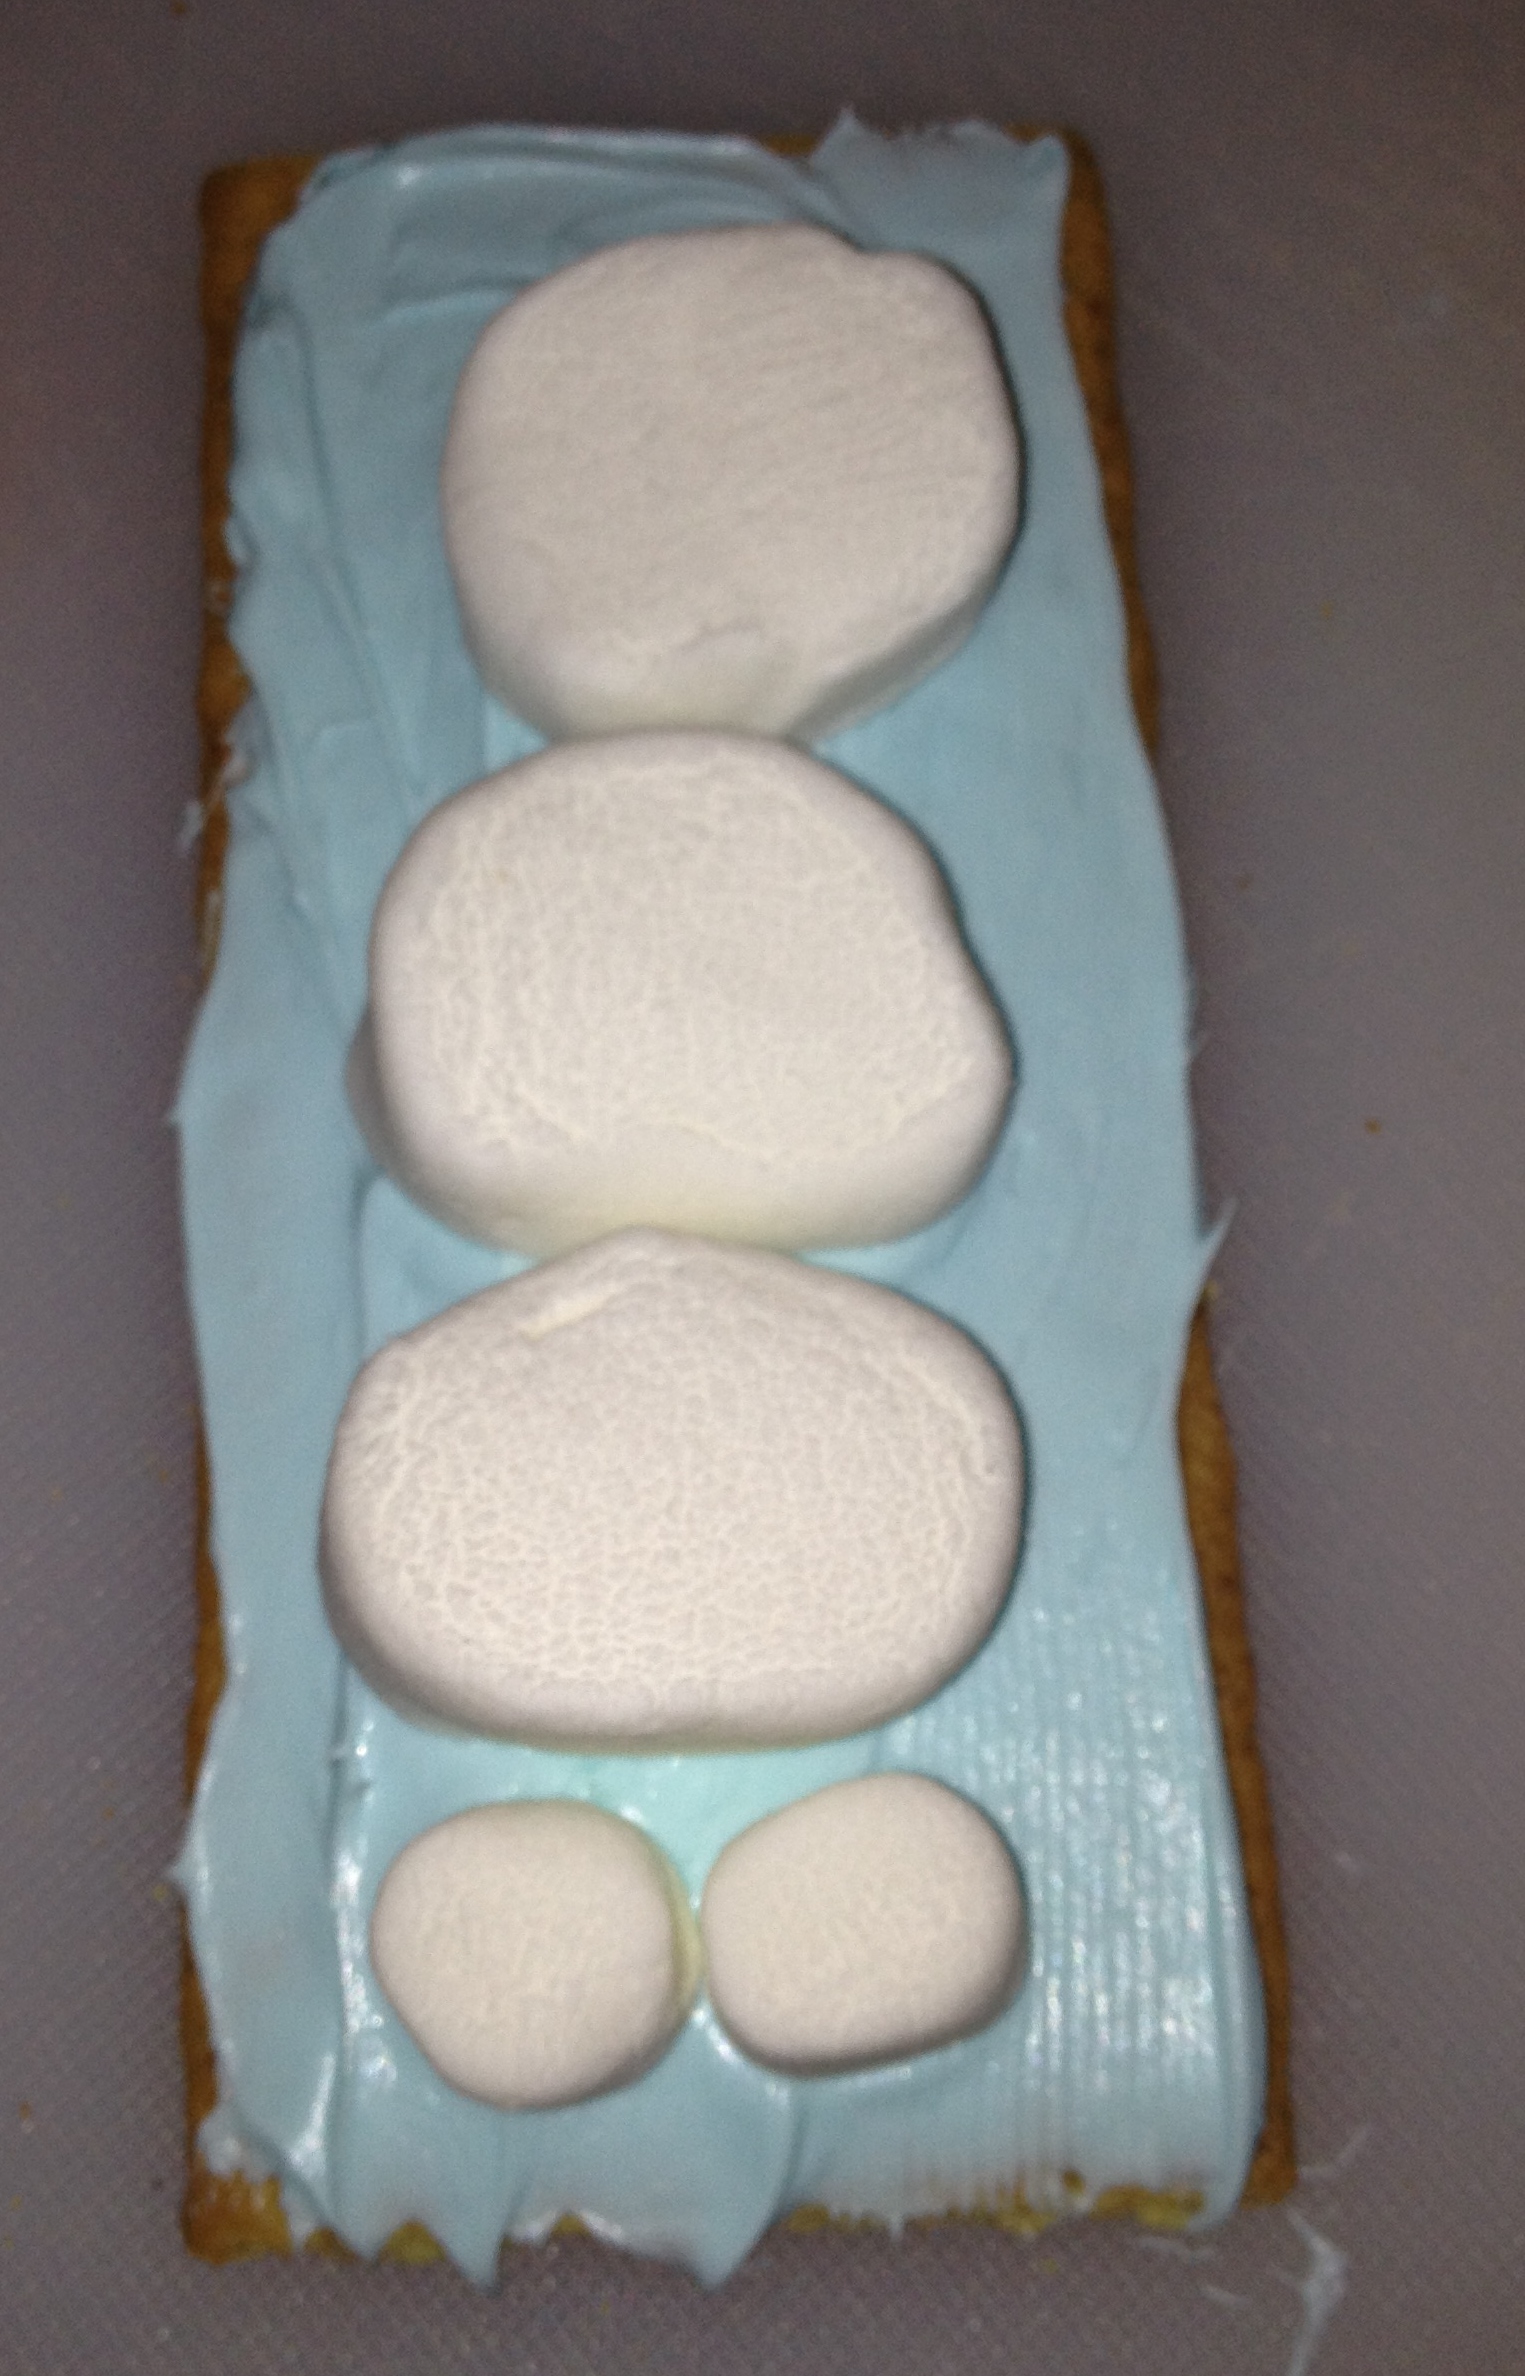
 Next comes the marshmallows. This part gets very sticky so keep your damp cloth handy to wipe off your scissors. First take two of the mini marshmallows and place them side by side at the very bottom of the cracker, into the icing. These are Olaf’s feet! Next, take a jumbo marshmallow and cut it in half. This goes on top of Olaf’s feet for his lower body. You will notice in my photos that I did not use a jumbo marshmallow. I could not find them so the whole body is made of the regular size marshmallows and they turned out just fine. 🙂 For Olaf’s upper body position one half of the regular sized marshmallow on your jumbo marshmallow.
Olaf’s head is a bit tricky. You will want to cut a diamond shape out of half of the regular sized marshmallow. Place it on Olaf’s upper body at an angle. You can play around a bit with the head piece and do what suits you best. There really is no right or wrong way to do it. Each of my Olaf’s is truly like a snowflake…everyone is different!
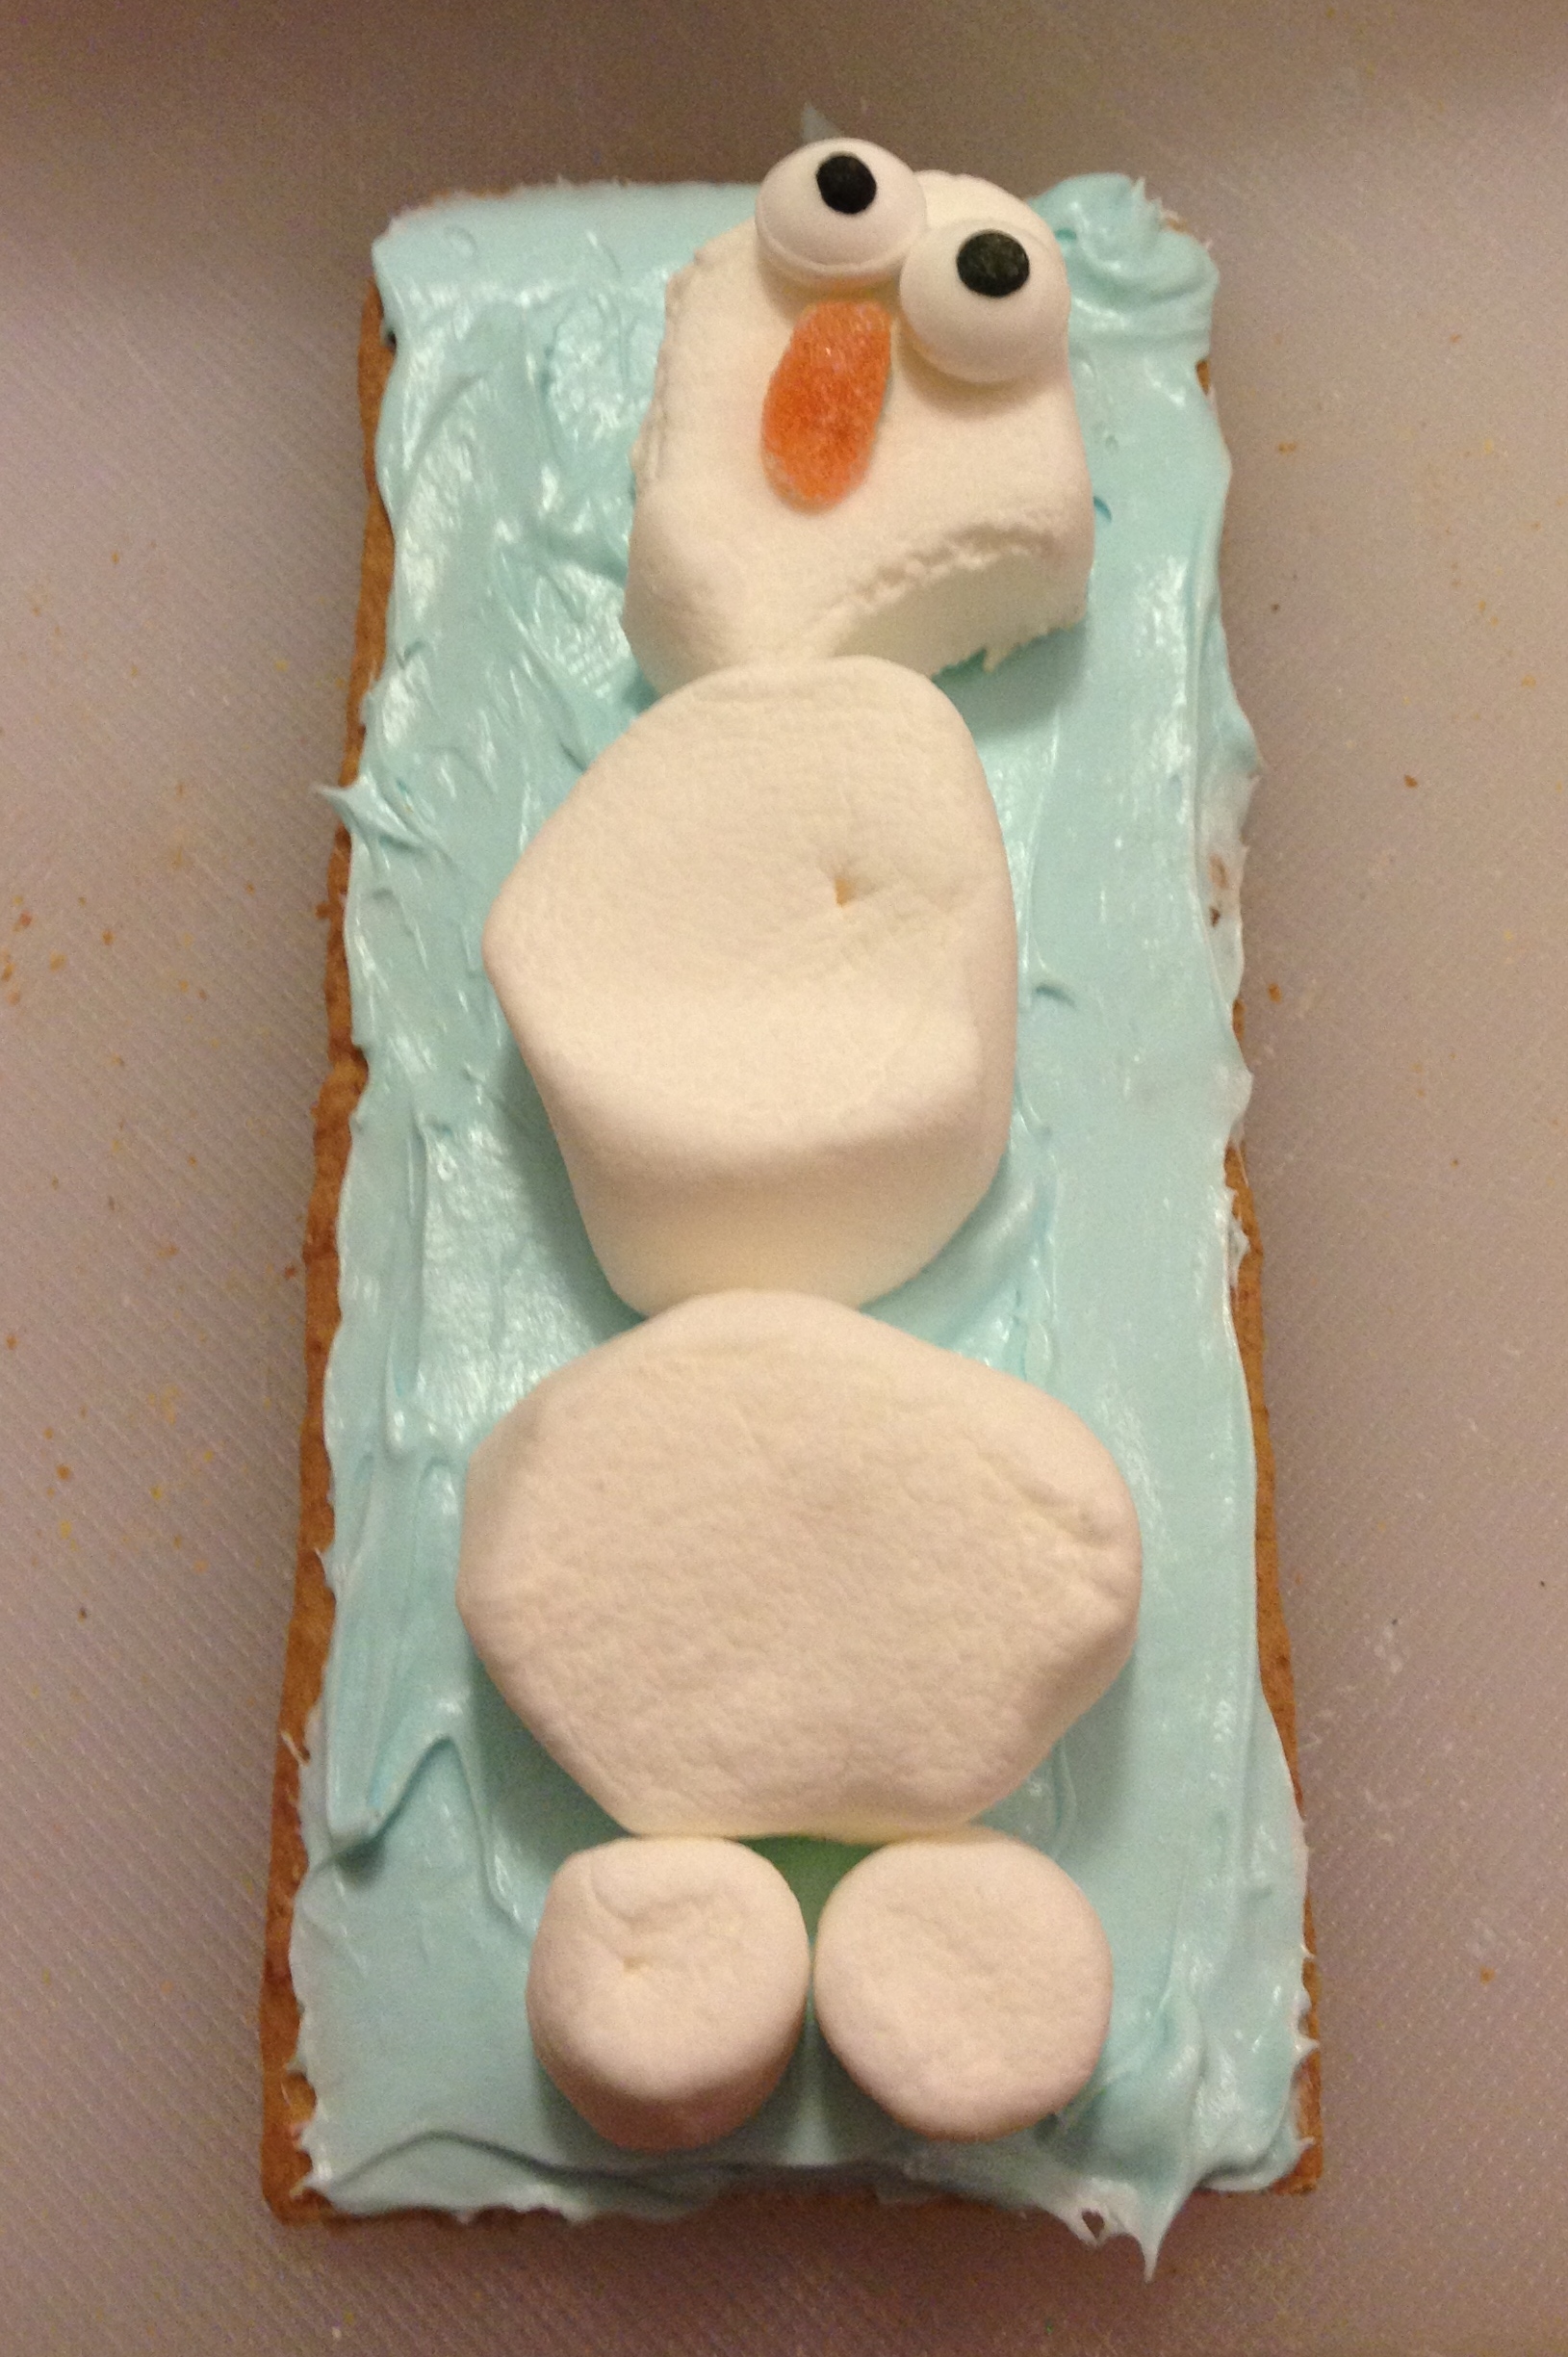
Once the body is put together you are ready to decorate your snowman! Dab a tiny amount of the white icing on the back of the candy eyes and place on Olaf’s head. Next position your orange candy piece for his nose. To make Olaf’s mouth and his buttons I put the black icing into a baggie ( or you can use an icing bag ), snipped off one corner and went to town! Olaf has three buttons, one on his upper body and two on his lower and a large, gaping smile. The smile is hard to make on a small marshmallow so just watch how much icing comes out. We had more then one Olaf look at little menacing. 🙂
The final stage to creating your Marshmallow Olaf Float is to apply the black licorice strips. Place one on each side of his upper body, pressing gently into the icing. Do the same for the small strand of licorice for Olaf’s hair. Volia! Your Marshmallow Olaf Float is complete!!
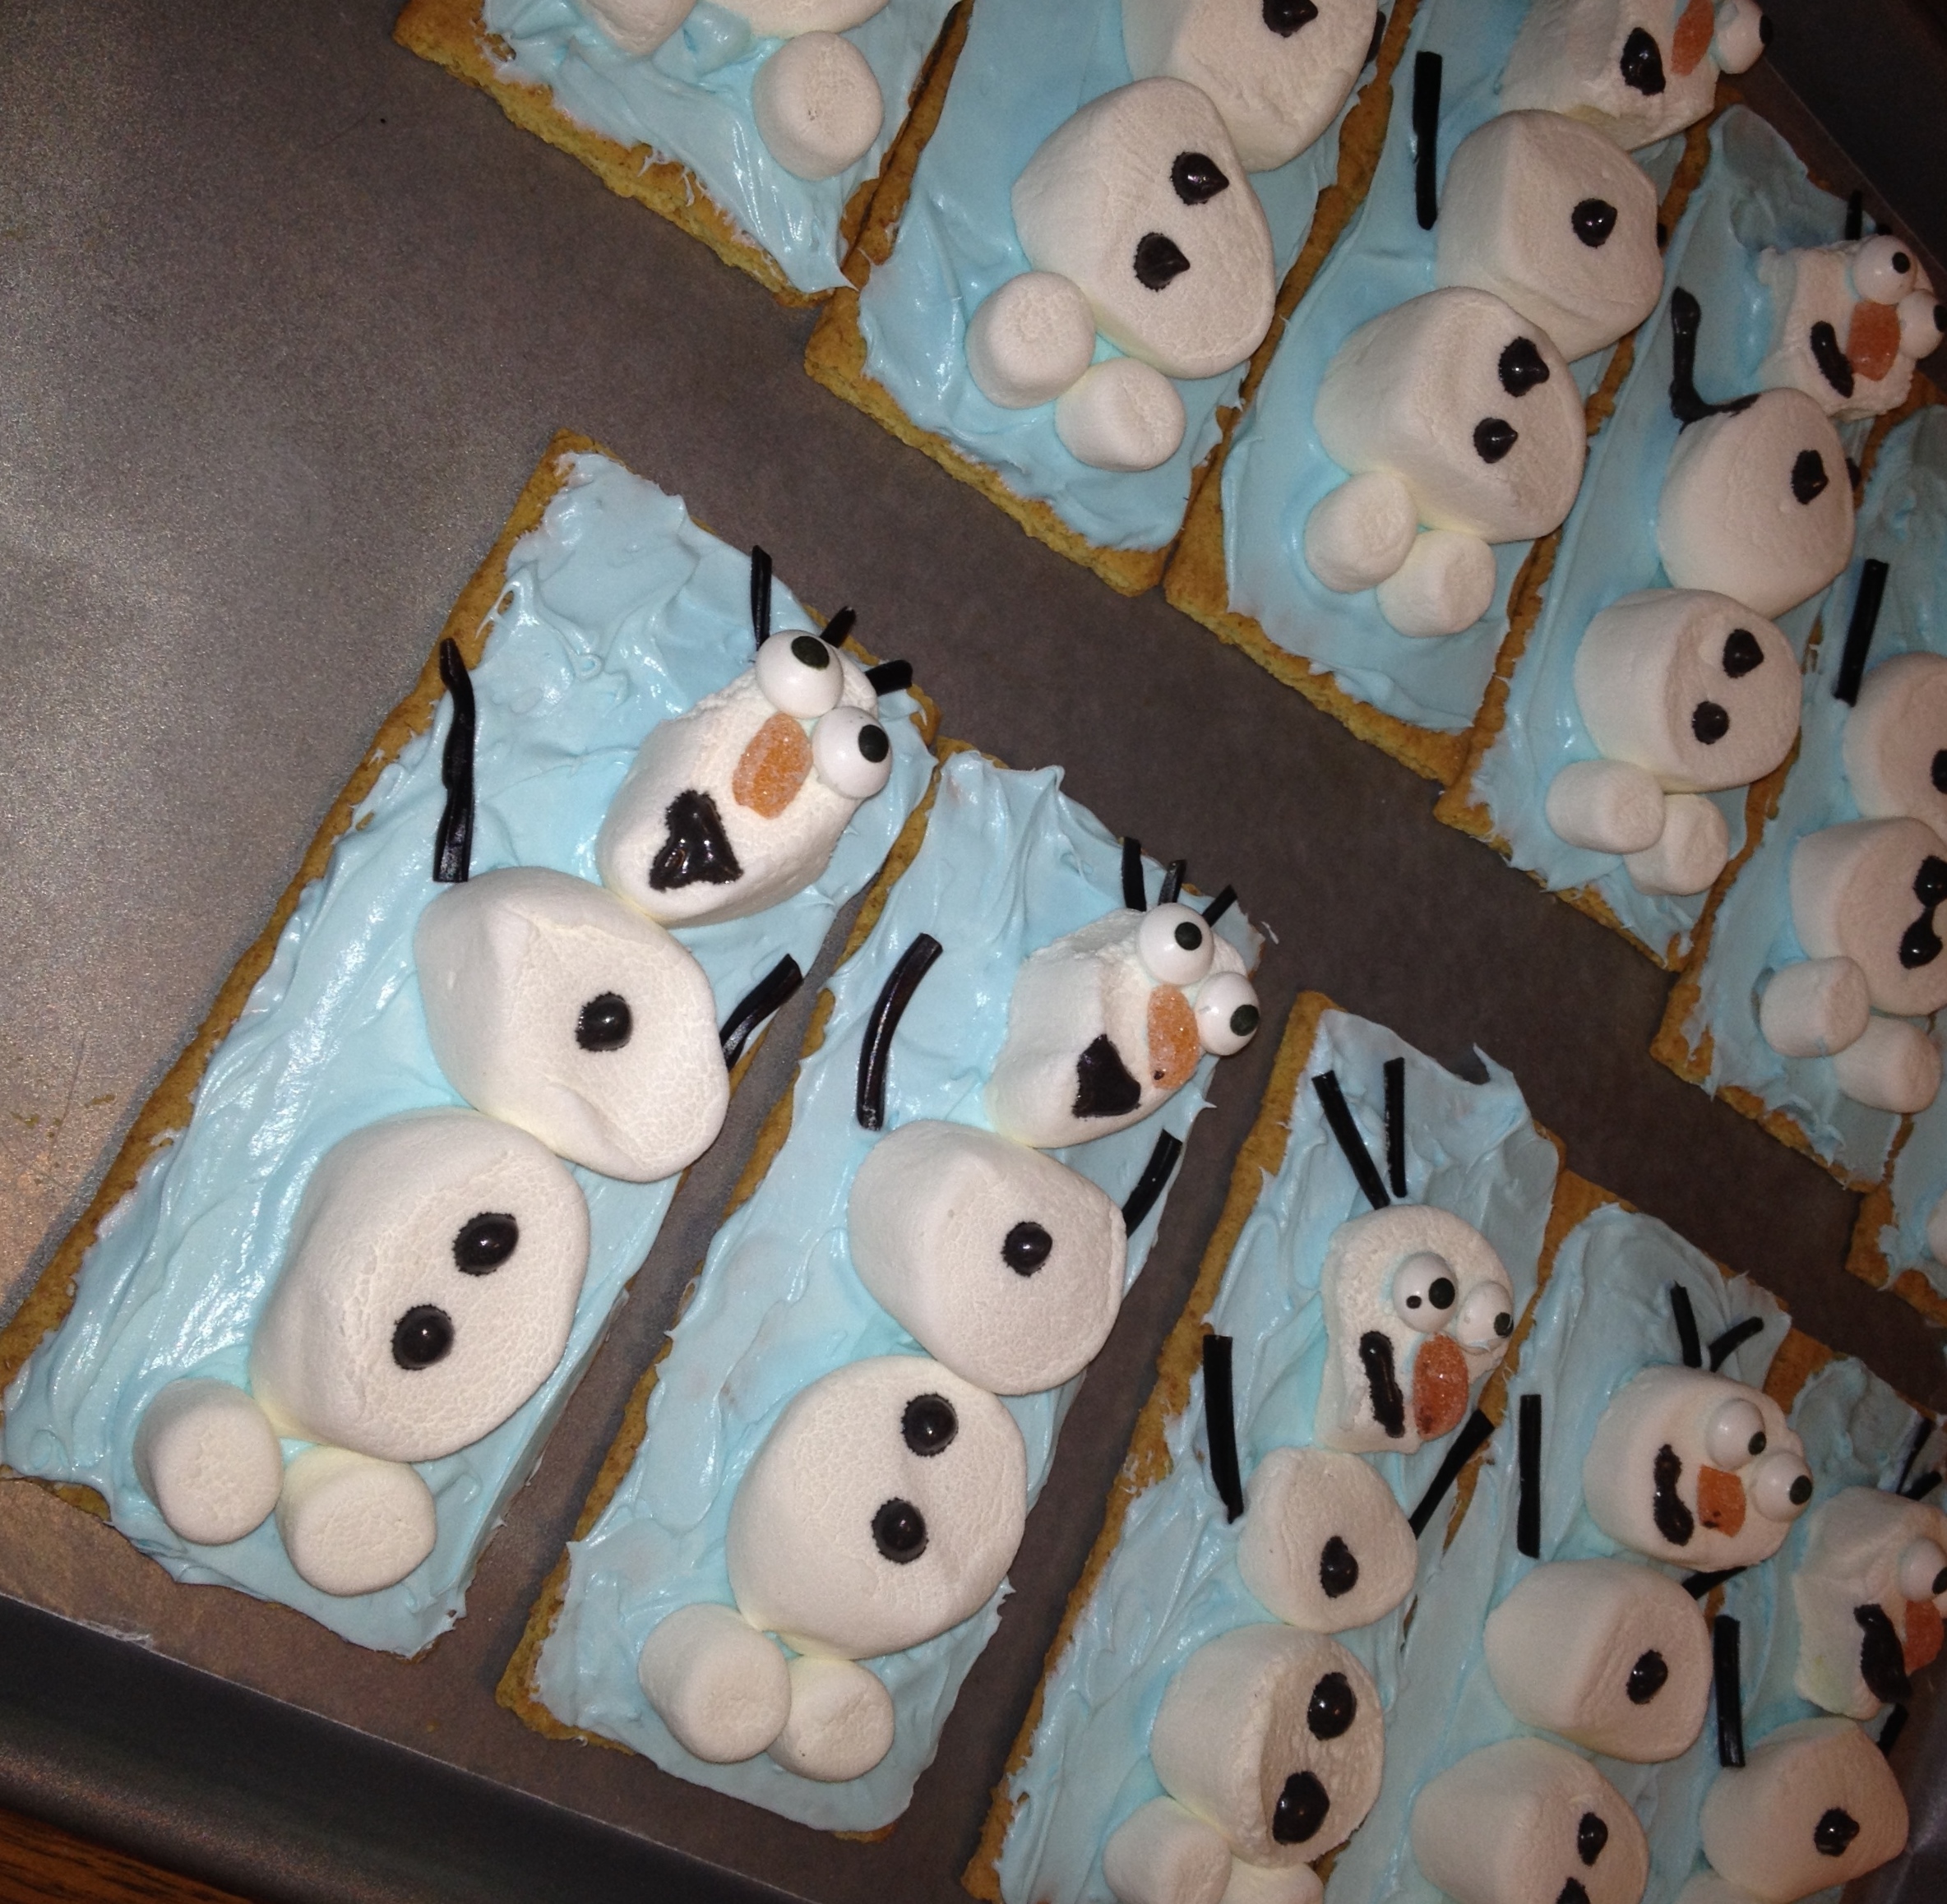 I placed my Olaf’s in the fridge so that the icing would firm up. Just before our party I removed them and placed each one into a clear treat bag and tied them off with a pretty ribbon. My Marshmallow Olaf Floats were a huge hit with our party guests and there was not a single one left! I was pretty happy with how this display of my Disney Side turned out. 🙂
Have you built a snowman this winter?
FT&PD
Suz
Sweet, Suzanne! I didn’t get to taste one, but with the ingredients mentioned, I’m sure they were delicious! And now I can see what Olaf looks like too! I copied the recipe…..you just never know……I may try my hand at making them too! Thanks for sharing!
Thanks Gem 🙂 Maybe we can do them in the summer with a Wasaga Beach theme, LOL..
Like Gemma said Suzanne, I didn’t get to have one either, the kids really enjoyed them! You did a great job in getting “Olaf” ready for the kids. I’ll let Gemma try her hand at them first and we’ll see what will happen after that.
Thank you Mom 🙂 They were a labour of love and I am happy that everyone liked them. I guess next time I will have to make more!
that is so freaking adorable!! Love it! Olaf is the best!
LOL, thanks Jennifer. They were a hoot to make!
So cute, what a tasty little snack for kids AND adults!
Thanks Katie, they turned out way better then the cookies, LOL
What an adorable idea! This is something even I could do (I am crafty/creative challenged LOL). I still haven’t seen this movie. I hear it is so good.
The movie is amazing Brandy, you will love it!
What a delicious treat! It looks really cute 🙂 The only problem is, I would probably eat it all before I gave it to my child haha.
LOL, yes they are that good Randa 🙂 Just means ya gotta make lots!
Aren’t those sweet? And, they look so easy to assemble and would make a great treat.
Very easy Pam and a great activity to get the kids involved in too!
Wow these are awesome. They look and sound great, I’d be eating as I make my creation for sure. Thanks for sharing this great idea!
They were pretty darn tasty for sure Sean 🙂 You will have fun making them I promise!
Brilliant and adorable snacks! Ours was a Frozen themed party as well.
Thanks Deb! It was such a great theme to work with <3
such a cute cookie idea, seems easy enough to recreate Olaf, I’m sure this would be a hit with all the kids!
Lyn it was so easy to do and fun! Give it a whirl!!
Oh My Gosh-these are PERFECT!!!! I adore everything you did for your party-it must have been the most magical day ever! You can bet Zack and I will be trying our hand at the Olaf cake for sure!
Thanks Gayle! You must share photos when you make that cake!
That is such a cute idea! My girls love the Frozen movie and would love to make this! Thx for posting 🙂
And it is so easy Mary 🙂 Thanks for stopping in!
How cute!
Thanks Kimberly!
Amazing ideas happen when you carry through on a theme, who knows what you will come up with next. Thank you
Thanks Darlene!
The grandkids are sure to love these
This is too cute. I am gonna try this the next time we watch it and have a family movie night
Olaf is the best…the grandkids would love this
This is just so creative,we tried these for the grandkids not as cute as yours but the kids enjoyed them !
Must try as my grandson would love these.
We are making these on the weekend for our Halloween party !!
A great treat the kids can help make.
They absolutely look like Olaf! I love this snack idea.
So cute and fun for the family to make.
looks like fun – the kids will love it. thanks
🙂
🙂